External hard drive reset
Author: t | 2025-04-23

Disconnect the external hard drive from your computer. Reboot your computer and then reconnect the external hard drive. 8. How to reset a 1TB external hard drive? The process to reset a 1TB external hard drive is the same as for any other external hard drive. Follow the steps to restart depending on your operating system: Windows or Mac. Unplug your Xbox and external hard drive from the power outlet. Make sure to unplug both your Xbox and external hard drive from the power outlet to ensure a proper reset. Step 2: Press the Button on the External Hard Drive. Locate the reset button. Locate the small reset button on the back or bottom of your external hard drive.
How To Factory Reset A External Hard Drive
Home > Free Partition Software > How to Reset Seagate External Hard Drive in Windows 11, 10, 8, 7 Are you unsatisfied with the performance of your Seagate external hard drive after long use? Learn how to reset Seagate external hard drive in Windows 11, 10, 8, 7 to solve it. Need to reset Seagate external hard drive completelySeagate external hard drive, a kind of popular portable storage device, has been used widely among computer users. You can use it to backup your important data or as an extended storage device for computer to save data.But after long use, you may need to reset your Seagate external hard drive totally to restore its performance and erase all existing data on Seagate external hard drive as you want are unsatisfied with its performance or donate it to others. You are certainly able to format Seagate external hard drive to erase all data on it, but the files just go apparently and can be restored easily by certain data recovery software.Great disk wipe utility: reset Seagate external hard drive totallySeagate external hard disk drive (HDD) and solid-state drive take different techniques to store data, thus you cannot reset Seagate external HDD and SSD completely using the same way. Here you can ask the help of AOMEI Partition Assistant Professional, which is featured with “Wipe Hard Drive” and “SSD Secure Erase”. With Wipe Hard Drive function, this freeware can help you to wipe Seagate external HDD to erase all data on the Seagate HDD irrevocably. With SSD Secure Erase function, the tool enables you to securely erase Seagate SSD to reset it to factory settings and restore its performance.How to reset Seagate external hard drive thoroughly in WindowsPS.: All data on the Seagate external hard drive will be erased, thus it is recommended important data on the Seagate disk before wiping or erasing it.You can download its demo version to have a try!✔ Reset Seagate external HDDStep 1. Connect your Seagate external hard disk drive to a working computer and ensure that it can be detected by OS. Install and run this software.Step
How To Reset An External Hard Drive - Robots.net
If your computer fails to recognize the Toshiba Canvio hard drive when connected, a reset can help re-establish the connection and make it accessible again. In cases where data corruption occurs on the hard drive, leading to file inaccessibility or errors, a reset can potentially repair the corrupted sectors and restore data integrity. If you encounter persistent issues with your Toshiba Canvio hard drive that cannot be resolved through常规troubleshooting methods, a reset can serve as a last resort to restore its default settings and eliminate potential software or hardware conflicts.In the realm of digital storage, Toshiba Canvio hard drives have established a reputation for reliability and efficiency. However, like any electronic device, they are not immune to occasional hiccups or performance issues. If you encounter problems with your Toshiba Canvio hard drive, a reset can often resolve the issue and restore its optimal functionality. This comprehensive guide will provide you with step-by-step instructions on how to reset a Toshiba Canvio hard drive, addressing various scenarios and potential challenges.Understanding the Need for a ResetThere are several instances where resetting a Toshiba Canvio hard drive becomes necessary. Here are some common scenarios:Drive Not Recognized: If your computer fails to recognize the Toshiba Canvio hard drive when connected, a reset can help re-establish the connection and make it accessible again.Data Corruption: In cases where data corruption occurs on the hard drive, leading to file inaccessibility or errors, a reset can potentially repair the corrupted sectors and restore data integrity.Performance Issues: If you experience slow transfer speeds, frequent freezes, or other performance-related problems with your Toshiba Canvio hard drive, a reset can optimize its performance and improve overall responsiveness.Firmware Update: Sometimes, resetting the hard drive is recommended after installing a firmware update to ensure proper implementation and functionality of the new firmware.Troubleshooting: If you encounter persistent issues with your Toshiba Canvio hard drive that cannot be resolved through常规troubleshooting methods, a reset can serve as a last resort to restore its default settings and eliminate potential software or hardware conflicts.Prerequisites for ResettingBefore proceeding with the reset process, ensure that you have the following prerequisites in place:1. Backup Your Data: It is crucial to back up all essential data stored on the Toshiba Canvio hard drive before performing a reset. This step is necessary to prevent data loss in case the reset process encounters any unexpected issues.2. Disconnect External Devices: Disconnect all external devices connected to your computer, except for the Toshiba Canvio hard drive you intend to reset. This will minimize potential conflicts and ensure a smooth reset process.3. Power Off and Reconnect: Power off your computer and disconnect the Toshiba Canvio hard drive. Wait for a few minutes before reconnecting the hard drive andHow to reset an external hard drive - tecnobits.com
To Your Drive The Issue?This is something to be aware of on older Macs. External Seagate storage takes gets their power through the Mac’s USB port and cable.Newer external USB storage conform to the latest USB standards and power draw has increased over the years.When you have an older Mac with newer drives, especially SSD (Solid State Drives). They’ll need more power than your older Mac can give them. In those cases, an independently powered USB hub is your friend to get your drive to show up on your Mac.External Seagate Desktop drives plug into external power sources. Double check that power source is actually working.5. Reboot Your Mac And See If A Reboot Shows Your Seagate Data DiskSometimes your Mac just needs a full shutdown. A wait of 10 seconds. Then a power on.A full shutdown restarts the software sitting at your Mac’s USB ports. And resets your Mac’s internal registries.When your Mac reboots. Log back in. And see if your Seagate external hard drive not showing up on Mac issue has gone.CLICK HERE: To Read A Review On the Seagate Expansion On Mac6. Seagate External Hard Drive Not Showing Up On Mac Quite YetYes, that’s right. It could be your Seagate hard drive isn’t showing up right now. But wait a bit and it could show up.Sounds weird? Yes, weird but true.Leave your Seagate storage drive plugged. And just wait.Sometimes 5 minutes or longer. Could be up to an hour for a larger Seagate drive.When you plug in an external disk drive Mac OS X runs a check on that drive.If your Mac OS finds an issue. It then does its best to repair it. If that’s successful then your Seagate external storage will show up.When your Mac is set up to show your external drive on the desktop. And you know your USB cable is good.Leave your Seagate external hard drive plugged in for a while.Let your Mac run its checks and do what it can to fix your drive. Then your external drive could just show up on your Mac.Sometimes patience is rewarded.7. Reset Your Mac’s NVRAMYour Mac’s NVRAM holds certain hardware settings for your Mac. And sometimes an NVRAM reset will cause your Seagate drive to show up on your Mac.This is not needed on an Apple Silicon Mac. A simple reboot is fine.On your Intel based Mac, MacBook Pro or MacBook Air. Fully shutdown your Mac.And while you power on. Hold down the OPTION + Command + P + R keys.Hold down all the keys at the same time.You’ll need to wait for at least 20 or so seconds.Wait till your Mac reboots, holding all the keys. Wait till your second start up chime.. Disconnect the external hard drive from your computer. Reboot your computer and then reconnect the external hard drive. 8. How to reset a 1TB external hard drive? The process to reset a 1TB external hard drive is the same as for any other external hard drive. Follow the steps to restart depending on your operating system: Windows or Mac.How to Reset an External Hard Drive - Techwalla
2. Run AOMEI Partition Assistant Professional. In the main interface, find out the Seagate external HDD, right-click it and choose “Wipe Hard Drive”.Step 3. In the small pop-up window, choose one wiping method (here I choose Fill sectors with random data). Then click “OK”.Step 4. Preview the operation and click “Apply” > “Proceed” to execute it.PS.: It is available to wipe Seagate hard drive that the operating system installed on by wiping hard drive from BIOS using AOMEI Partition Assistant.This is a detailed tutorial on how to wipe Seagate external hard disk drive. If what you need to reset is Seagate external SSD, refer to the following context.✔ Reset Seagate SSD to factory settingsStep 1. Connect the Seagate solid-state drive to a Windows 7 computer via SATA port (since SSD Secure Erase is only workable in Windows at present). Install and run AOMEI Partition Assistant Professional. Locate the Seagate external SSD and choose "Wipe" > “SSD Secure Erase”.Step 2. Select the right SSD to erase. It is available to double-click the selected SSD to see more information about it.Step 3. It is possible that the selected SSD is in frozen status. If you encounter such a situation, do hot-swap to release it.The steps to make hot-swap:• Open your computer case. If it is a laptop, open the rear cover or drive shell. • Locate the Seagate SSD that needs erasing. • Unplug the power cable and SATA data cable of the selected SSD in order. • Reconnect the SATA data cable and power cable in sequence.Step 4. After that, you can continue to securely erase the Seagate external SSD. When the operation finishes, you’ll get a prompt. Then, click the “Finish” button.These steps above are about how to securely erase Seagate external SSD to restore it to its peak performance.Wrap things upWhen you need to reset Seagate external hard drive to erase data permanently and restore its performance, no matter Seagate external HDD or SSD, AOMEI Partition Assistant Professional can always be the right choice. In addition, AOMEI Partition Assistant Professional enjoys more functions like deleting partition from BIOS, resizingfactory resetting laptop with external hard drive
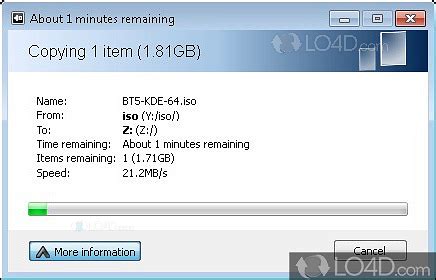
With the system and then follow the steps:Open Control Panel.Click System and Security.Click Backup & Restore.From the left pane, click Create a System Image option.Now, the screen of “Where do you want to save the backup?” will appear, pick the option of On a hard disk.From On a hard disk drop-down menu, choose the location for backup.Select additional drives that is required in a backup.Click Next.Click Start Backup.Steps to Backup using External DriveNow, you can use an external drive to copy the important data. To implement the same, connect an external drive with having large storage space and follow the steps:Go to File Explorer.Navigate to the location of files or folders whose data you are looking to backup.Choose the necessary files/folders.Click Copy to button appearing in the Home tab.Click Choose location option.Select the connected external drive.Click Copy.After completing the steps, files will be started copying to an external drives that is specified.Wipe Windows 10 ComputerThere are multiple ways to wipe data from old Windows 10 computer:Manual ProcedureProfessional and Recommended Method.Method 1. Erasing all Data from Windows ManuallyIn the following section, utilize the recovery options in order to safely wipe the device completely and reset again to factory settings allowing the next possessor to set up the same as per need. Now, follow the steps to wipe and reset the PC:Go to Settings.Click Update & Security option.Click Recovery.Now click Get Started showing under Reset this PC.Choose Remove Everything.Click Change Settings and press the Next button.Enable Data Erasure by turning on the toggle.Note. If you are having more than one drive, then the additional Data Drives option will appear which will help in erasing the files from all the drives. The option will display when an external storage drive is connected to the machine. It is recommended to perform the process without connecting the external drive.Click Confirm.Press the Next button.Hit the Reset button.Note. After the reset process is completed, it is not important to finish out-of-box-experience i.e. OOBE as it is the part where the next owner will set the device according to his/her settings.After the process completion, the entire hard driveAmazon.co.uk: External Hard Drives - External Hard Drives / External
How to wipe a hard drive windows 11Wiping a hard drive on Windows 11 is essential for securely erasing all the data and making sure no one can recover it. This guide will walk you through the steps to safely and completely wipe your hard drive using built-in Windows tools. By the end of this tutorial, you’ll have a clean slate, ready for a fresh start or to pass along to someone else.In this section, we’ll cover the necessary steps to completely wipe a hard drive on Windows 11. We’ll go through each step to make sure your data is securely erased.Step 1: Backup Your DataBefore wiping the hard drive, it’s essential to back up any files you want to keep.Make sure you have saved all important documents, pictures, and other files to an external drive or cloud storage. Once you wipe the hard drive, you cannot recover the data.Step 2: Open SettingsGo to the Start menu and click on the "Settings" icon which looks like a gear.The Settings app is where you can access all the necessary options to make changes to your system.Step 3: Select "System"In the Settings window, click on "System" to access system-related settings.These settings include Display, Sound, and Storage options. We are interested in the Storage settings for this task.Step 4: Go to "Recovery"Scroll down in the System settings and click on "Recovery."The Recovery settings will guide you through the process of resetting your PC and wiping the hard drive.Step 5: Click "Reset PC"Under the Recovery options, click on the "Reset PC" button.This button initiates the process of wiping your hard drive and reinstalling Windows 11.Step 6: Choose "Remove Everything"When prompted, select the option "Remove everything."This ensures that all your files, apps, and settings will be deleted from the hard drive.Step 7: Select "Local Reinstall" or "Cloud Download"Choose either "Local reinstall" or "Cloud download" based on your preference.Local reinstall uses files already on your PC, while Cloud download fetches the latest version of Windows 11 from the internet.Step 8: Click "Next" and then "Reset"Follow the prompts and click "Next," then click on the "Reset" button to begin the process.Your PC will restart, and Windows 11 will begin wiping your hard drive and reinstalling itself.Once you complete these steps, your Windows 11 hard drive will be wiped clean, and the operating system will be reinstalled. Your PC will be like new, with no trace of your previous data.Tips for How to Wipe a Hard Drive Windows 11Backup Everything: Always ensure you have backed up all important data before starting the wipe process.Check Internet Connection: For a Cloud download reinstall, make sure you have a stable internet connection.Use Reliable Backup Media: Use a trusted external hard driveThe MBR was reset on my external hard drive and now the drive
The external hard drive is showing up in Disk Utility or not.Solution 7: Run Mac diagnostics to detect hardware issuesCan't see the external hard drive in Disk Utility still? You can try Apple Diagnostics. It is a set of diagnostic tools used by technicians to find faults. You can use it to isolate a possible hardware issue on your Mac. It also suggests solutions and helps you contact Apple Support for assistance.1. It is advised to disconnect all external devices except the keyboard, mouse, and other useful devices.2. Reboot your Mac or you can power on your Mac if is powered off.3. Press and hold the D button on your keyboard. Hold the button until you would be asked to choose a language.4. After selecting your language, it will display a progress bar stating "checking your mac".5. After completing the diagnostics, it will suggest the solutions for the errors diagnosed.Solution 8: Reset your Mac's NVRAM or PRAMNVRAM is a small amount of memory on your Mac. It saves specific data regardless if the Mac is powered on or off. If you experience issues related to hardware, resetting NVRAM might help. PRAM stores similar information and the steps for resetting NVRAM and PRAM are the same.1. Shut down or reboot your Mac.2. Immediately press these four keys in a sequence i.e. Command, Option, P, and R.3. Hold the keys for at least 20 seconds and after you hear the second chime, release the buttons.4. After releasing the keys, your Mac will restart and hopefully your drive will show up.Solution 9: Reset the SMC on your MacIf you have reset the NVRAM or PRAM, you've done it all. But what if your external hard drive is still behaving strangely? In certain circumstances, resetting SMC can be a solution. SMC, short for System Management Controller, is responsible for lower-level functions on Intel-based Mac computers. Resetting it can solve particular power and hardware-related troubles.This is how to reset the SMC of a MacBook Air, MacBook Pro Retina, or MacBook Pro with an internal non-removable battery:1. Shut down your MacBook Air/MacBook Pro.2. Connect the power adapter to the Mac.3. After your Mac shuts down, press Shift + Control + Option key combinations, then press the power button at the same time. Hold these keys and the power button for 10 seconds.4. Release all keys and the power button at the same time.5. Press the power button again to turn on your Mac.The boot time after resetting a machine's SMC can be a bit longer than usual, which is normal.Solution 10: Ask for help from local techniciansIf unfortunately, your external hard drive has some serious hardware problems, no software can help you fix the external hard drive not showing up in Disk Utility. The only solution is to send it to a local data recovery service or replace it with a new one.If your problem has been solved, you can share this wonderful tutorial to help more people.How to recover lost data from corrupted external hard. Disconnect the external hard drive from your computer. Reboot your computer and then reconnect the external hard drive. 8. How to reset a 1TB external hard drive? The process to reset a 1TB external hard drive is the same as for any other external hard drive. Follow the steps to restart depending on your operating system: Windows or Mac. Unplug your Xbox and external hard drive from the power outlet. Make sure to unplug both your Xbox and external hard drive from the power outlet to ensure a proper reset. Step 2: Press the Button on the External Hard Drive. Locate the reset button. Locate the small reset button on the back or bottom of your external hard drive.
Amazon.com: External Hard Drives - External Hard Drives
A blue "Automatic Repair" or "Recovery" screen.However, if the screen remains stuck on the black screen with "Preparing Automatic Repair" for an extended period, you can try the following solutions:Solution 1: Remove External Devices and RestartTurn off the device. Press and hold the power button until the power light goes off to shut down the device.Remove all external devices, including the keyboard, mouse, external hard drive, printer, memory cards, CDs in the optical drive, and any adapter cards in card readers. Sometimes, external devices can prevent your device from entering the repair screen.Note: Also, disconnect all external displays. If it's a desktop computer, start with one external display to verify that your computer can boot and display properly.After removing the connected devices, power on the device and check if this resolves your issue. If not, proceed to the next solution.Solution 2: Force Shutdown and Perform CMOS ResetAttempt a force shutdown. Press and hold the power button until the power light goes off to shut down the device.Perform an Embedded Controller (EC Reset) or Real-Time Clock (RTC) reset to restore the hardware in your device to its default state. You can refer to the following articles to understand how to clear it:For Notebook/All-in-One PC/Gaming Handheld: How to Reset Embedded Controller (EC Reset), Real-Time Clock (RTC), and Hard ResetFor Desktop: How to clear CMOS If your device can boot into Windows after the restart, make sure to update the BIOS, Windows updates, and drivers to their latest versions to prevent future issues.WD External Hard Drives in External Hard Drives
If you’re looking to wipe a hard drive on Windows 10, you’ve come to the right place. This guide will walk you through the steps to completely erase everything on your hard drive, ensuring your data is unrecoverable. Whether you’re selling your computer, donating it, or just starting fresh, follow these steps to securely wipe your hard drive.Before we dive in, know that wiping your hard drive means all the data on it will be erased. So, make sure you have backed up any important files. Ready? Let’s go!Step 1: Open SettingsFirst, open the Settings app by clicking the Start menu and selecting the gear icon.The Settings app is where you’ll find most of the controls for your system. This is your hub for making changes to your Windows 10 computer.Step 2: Navigate to Update & SecurityIn the Settings app, click on "Update & Security."This section deals with updates, recovery, and backup options. It’s the place to go when you need to reset your PC.Step 3: Click on RecoveryWithin the Update & Security section, find and click on "Recovery."The Recovery section is where you can reset your PC, go back to a previous version of Windows 10, or use advanced startup options.Step 4: Click Get StartedUnder the Reset this PC section, click on the "Get Started" button.This will initiate the process of resetting your PC, giving you options to either keep your files or remove everything.Step 5: Choose Remove EverythingWhen prompted, choose the "Remove everything" option.This option will clean your hard drive entirely, removing all your personal files, apps, and settings.Step 6: Choose Local Reinstall or Cloud DownloadSelect either "Local reinstall" or "Cloud download." Local reinstall means your computer will use existing files to reinstall Windows, while cloud download will fetch the latest version from Microsoft’s servers.Step 7: Select Clean the DriveWhen asked, choose "Clean the drive" to ensure all data is permanently erased.This option makes it harder for anyone to recover your deleted files, providing an extra layer of security.Step 8: Click Next and ResetFinally, click "Next," review the summary, and hit "Reset."Your computer will restart and begin the process of wiping the hard drive and reinstalling Windows 10.After completing these steps, your computer will be like new, with all data permanently removed.Tips for How to Wipe a Hard Drive Windows 10Backup your files: Always make sure you have a backup of important files before starting this process.Disconnect external drives: Unplug any external hard drives or USBs to avoid accidentally wiping them.Check for updates: Make sure your system is updated before you begin the reset process.Be patient: The process can take some time, so be patient and don’t interrupt it.Consider professional help: If you’re unsure about the process, consult a tech professional.Frequently Asked QuestionsWill wiping my hard drive delete Windows 10?No, selecting the reset option will reinstall a fresh copy of Windows 10 while erasing all other data.Can I recover data after wiping my hard drive?If you choose the "Clean the drive" option, recovering data becomes extremely difficult. It’s. Disconnect the external hard drive from your computer. Reboot your computer and then reconnect the external hard drive. 8. How to reset a 1TB external hard drive? The process to reset a 1TB external hard drive is the same as for any other external hard drive. Follow the steps to restart depending on your operating system: Windows or Mac. Unplug your Xbox and external hard drive from the power outlet. Make sure to unplug both your Xbox and external hard drive from the power outlet to ensure a proper reset. Step 2: Press the Button on the External Hard Drive. Locate the reset button. Locate the small reset button on the back or bottom of your external hard drive.2TB External Hard Drives in External Hard Drives
Then, click on the Erase tab in the Disk Utility toolbar. In the drop-down panel, set the partition scheme to GUID. Set the name of the drive and format to Mac OS Extended (Journaled). Finally, click Erase to complete the reformatting process. Always remember to back up your data before reformatting a drive!Getting Mac to Recognize External Hard DriveFirst, check the connections between the external hard drive and your Mac. Make sure your hard drive has a sufficient power supply and that the USB ports are not loose. Try plugging the external hard drive into another USB port on your Mac, and make sure to plug it in slowly. If that doesn’t work, try restarting your Mac or resetting your System Management Controller (SMC). If none of these steps work, you may need to reset the device’s firmware. You can find instructions on how to do this online. Additionally, you can contact Apple Support for further assistance.Source: westerndigital.comTroubleshooting Mac Not Recognizing External Hard DriveThere could be a few reasons why your Mac is not recognizing your external hard drive. First, you should check to make sure the power supply and cable are properly connected and working. If that doesn’t solve the issue, then it could be that your drive is formatted incorrectly for your Mac. In this case, you can use Disk Utility to reformat the drive in a compatible format such as ExFAT or APFS. It’s also possible that the drive has become corrupted or damaged. In this case, you should try using disk repair tools such as Disk Warrior or Drive Genius to diagnose and repair any issues with the drive.Troubleshooting Issues with Mac Not Reading External Hard DriveThere are a few possible reasons why your Mac isn’t reading your external hard drive. First, it could be that the hard drive is formatted in a file system that is not compatible with macOS, such as NTFS or HFS+. Second, the USB cable connecting the hard drive to your Mac could be loosely connected or frayed. Third, the external hard drive may be damaged or corrupted and needs to be repaired or replaced. Lastly, it’s possible that there is an issue with the settings on your Mac itself. To troubleshoot this issue, try checking all of these possibilities and see if any of them resolve the issue.Troubleshooting WD Elements Not Being RecognizedIt is possible that your WD Elements ExternalComments
Home > Free Partition Software > How to Reset Seagate External Hard Drive in Windows 11, 10, 8, 7 Are you unsatisfied with the performance of your Seagate external hard drive after long use? Learn how to reset Seagate external hard drive in Windows 11, 10, 8, 7 to solve it. Need to reset Seagate external hard drive completelySeagate external hard drive, a kind of popular portable storage device, has been used widely among computer users. You can use it to backup your important data or as an extended storage device for computer to save data.But after long use, you may need to reset your Seagate external hard drive totally to restore its performance and erase all existing data on Seagate external hard drive as you want are unsatisfied with its performance or donate it to others. You are certainly able to format Seagate external hard drive to erase all data on it, but the files just go apparently and can be restored easily by certain data recovery software.Great disk wipe utility: reset Seagate external hard drive totallySeagate external hard disk drive (HDD) and solid-state drive take different techniques to store data, thus you cannot reset Seagate external HDD and SSD completely using the same way. Here you can ask the help of AOMEI Partition Assistant Professional, which is featured with “Wipe Hard Drive” and “SSD Secure Erase”. With Wipe Hard Drive function, this freeware can help you to wipe Seagate external HDD to erase all data on the Seagate HDD irrevocably. With SSD Secure Erase function, the tool enables you to securely erase Seagate SSD to reset it to factory settings and restore its performance.How to reset Seagate external hard drive thoroughly in WindowsPS.: All data on the Seagate external hard drive will be erased, thus it is recommended important data on the Seagate disk before wiping or erasing it.You can download its demo version to have a try!✔ Reset Seagate external HDDStep 1. Connect your Seagate external hard disk drive to a working computer and ensure that it can be detected by OS. Install and run this software.Step
2025-03-28If your computer fails to recognize the Toshiba Canvio hard drive when connected, a reset can help re-establish the connection and make it accessible again. In cases where data corruption occurs on the hard drive, leading to file inaccessibility or errors, a reset can potentially repair the corrupted sectors and restore data integrity. If you encounter persistent issues with your Toshiba Canvio hard drive that cannot be resolved through常规troubleshooting methods, a reset can serve as a last resort to restore its default settings and eliminate potential software or hardware conflicts.In the realm of digital storage, Toshiba Canvio hard drives have established a reputation for reliability and efficiency. However, like any electronic device, they are not immune to occasional hiccups or performance issues. If you encounter problems with your Toshiba Canvio hard drive, a reset can often resolve the issue and restore its optimal functionality. This comprehensive guide will provide you with step-by-step instructions on how to reset a Toshiba Canvio hard drive, addressing various scenarios and potential challenges.Understanding the Need for a ResetThere are several instances where resetting a Toshiba Canvio hard drive becomes necessary. Here are some common scenarios:Drive Not Recognized: If your computer fails to recognize the Toshiba Canvio hard drive when connected, a reset can help re-establish the connection and make it accessible again.Data Corruption: In cases where data corruption occurs on the hard drive, leading to file inaccessibility or errors, a reset can potentially repair the corrupted sectors and restore data integrity.Performance Issues: If you experience slow transfer speeds, frequent freezes, or other performance-related problems with your Toshiba Canvio hard drive, a reset can optimize its performance and improve overall responsiveness.Firmware Update: Sometimes, resetting the hard drive is recommended after installing a firmware update to ensure proper implementation and functionality of the new firmware.Troubleshooting: If you encounter persistent issues with your Toshiba Canvio hard drive that cannot be resolved through常规troubleshooting methods, a reset can serve as a last resort to restore its default settings and eliminate potential software or hardware conflicts.Prerequisites for ResettingBefore proceeding with the reset process, ensure that you have the following prerequisites in place:1. Backup Your Data: It is crucial to back up all essential data stored on the Toshiba Canvio hard drive before performing a reset. This step is necessary to prevent data loss in case the reset process encounters any unexpected issues.2. Disconnect External Devices: Disconnect all external devices connected to your computer, except for the Toshiba Canvio hard drive you intend to reset. This will minimize potential conflicts and ensure a smooth reset process.3. Power Off and Reconnect: Power off your computer and disconnect the Toshiba Canvio hard drive. Wait for a few minutes before reconnecting the hard drive and
2025-03-252. Run AOMEI Partition Assistant Professional. In the main interface, find out the Seagate external HDD, right-click it and choose “Wipe Hard Drive”.Step 3. In the small pop-up window, choose one wiping method (here I choose Fill sectors with random data). Then click “OK”.Step 4. Preview the operation and click “Apply” > “Proceed” to execute it.PS.: It is available to wipe Seagate hard drive that the operating system installed on by wiping hard drive from BIOS using AOMEI Partition Assistant.This is a detailed tutorial on how to wipe Seagate external hard disk drive. If what you need to reset is Seagate external SSD, refer to the following context.✔ Reset Seagate SSD to factory settingsStep 1. Connect the Seagate solid-state drive to a Windows 7 computer via SATA port (since SSD Secure Erase is only workable in Windows at present). Install and run AOMEI Partition Assistant Professional. Locate the Seagate external SSD and choose "Wipe" > “SSD Secure Erase”.Step 2. Select the right SSD to erase. It is available to double-click the selected SSD to see more information about it.Step 3. It is possible that the selected SSD is in frozen status. If you encounter such a situation, do hot-swap to release it.The steps to make hot-swap:• Open your computer case. If it is a laptop, open the rear cover or drive shell. • Locate the Seagate SSD that needs erasing. • Unplug the power cable and SATA data cable of the selected SSD in order. • Reconnect the SATA data cable and power cable in sequence.Step 4. After that, you can continue to securely erase the Seagate external SSD. When the operation finishes, you’ll get a prompt. Then, click the “Finish” button.These steps above are about how to securely erase Seagate external SSD to restore it to its peak performance.Wrap things upWhen you need to reset Seagate external hard drive to erase data permanently and restore its performance, no matter Seagate external HDD or SSD, AOMEI Partition Assistant Professional can always be the right choice. In addition, AOMEI Partition Assistant Professional enjoys more functions like deleting partition from BIOS, resizing
2025-04-12With the system and then follow the steps:Open Control Panel.Click System and Security.Click Backup & Restore.From the left pane, click Create a System Image option.Now, the screen of “Where do you want to save the backup?” will appear, pick the option of On a hard disk.From On a hard disk drop-down menu, choose the location for backup.Select additional drives that is required in a backup.Click Next.Click Start Backup.Steps to Backup using External DriveNow, you can use an external drive to copy the important data. To implement the same, connect an external drive with having large storage space and follow the steps:Go to File Explorer.Navigate to the location of files or folders whose data you are looking to backup.Choose the necessary files/folders.Click Copy to button appearing in the Home tab.Click Choose location option.Select the connected external drive.Click Copy.After completing the steps, files will be started copying to an external drives that is specified.Wipe Windows 10 ComputerThere are multiple ways to wipe data from old Windows 10 computer:Manual ProcedureProfessional and Recommended Method.Method 1. Erasing all Data from Windows ManuallyIn the following section, utilize the recovery options in order to safely wipe the device completely and reset again to factory settings allowing the next possessor to set up the same as per need. Now, follow the steps to wipe and reset the PC:Go to Settings.Click Update & Security option.Click Recovery.Now click Get Started showing under Reset this PC.Choose Remove Everything.Click Change Settings and press the Next button.Enable Data Erasure by turning on the toggle.Note. If you are having more than one drive, then the additional Data Drives option will appear which will help in erasing the files from all the drives. The option will display when an external storage drive is connected to the machine. It is recommended to perform the process without connecting the external drive.Click Confirm.Press the Next button.Hit the Reset button.Note. After the reset process is completed, it is not important to finish out-of-box-experience i.e. OOBE as it is the part where the next owner will set the device according to his/her settings.After the process completion, the entire hard drive
2025-03-29